Listening and levelling
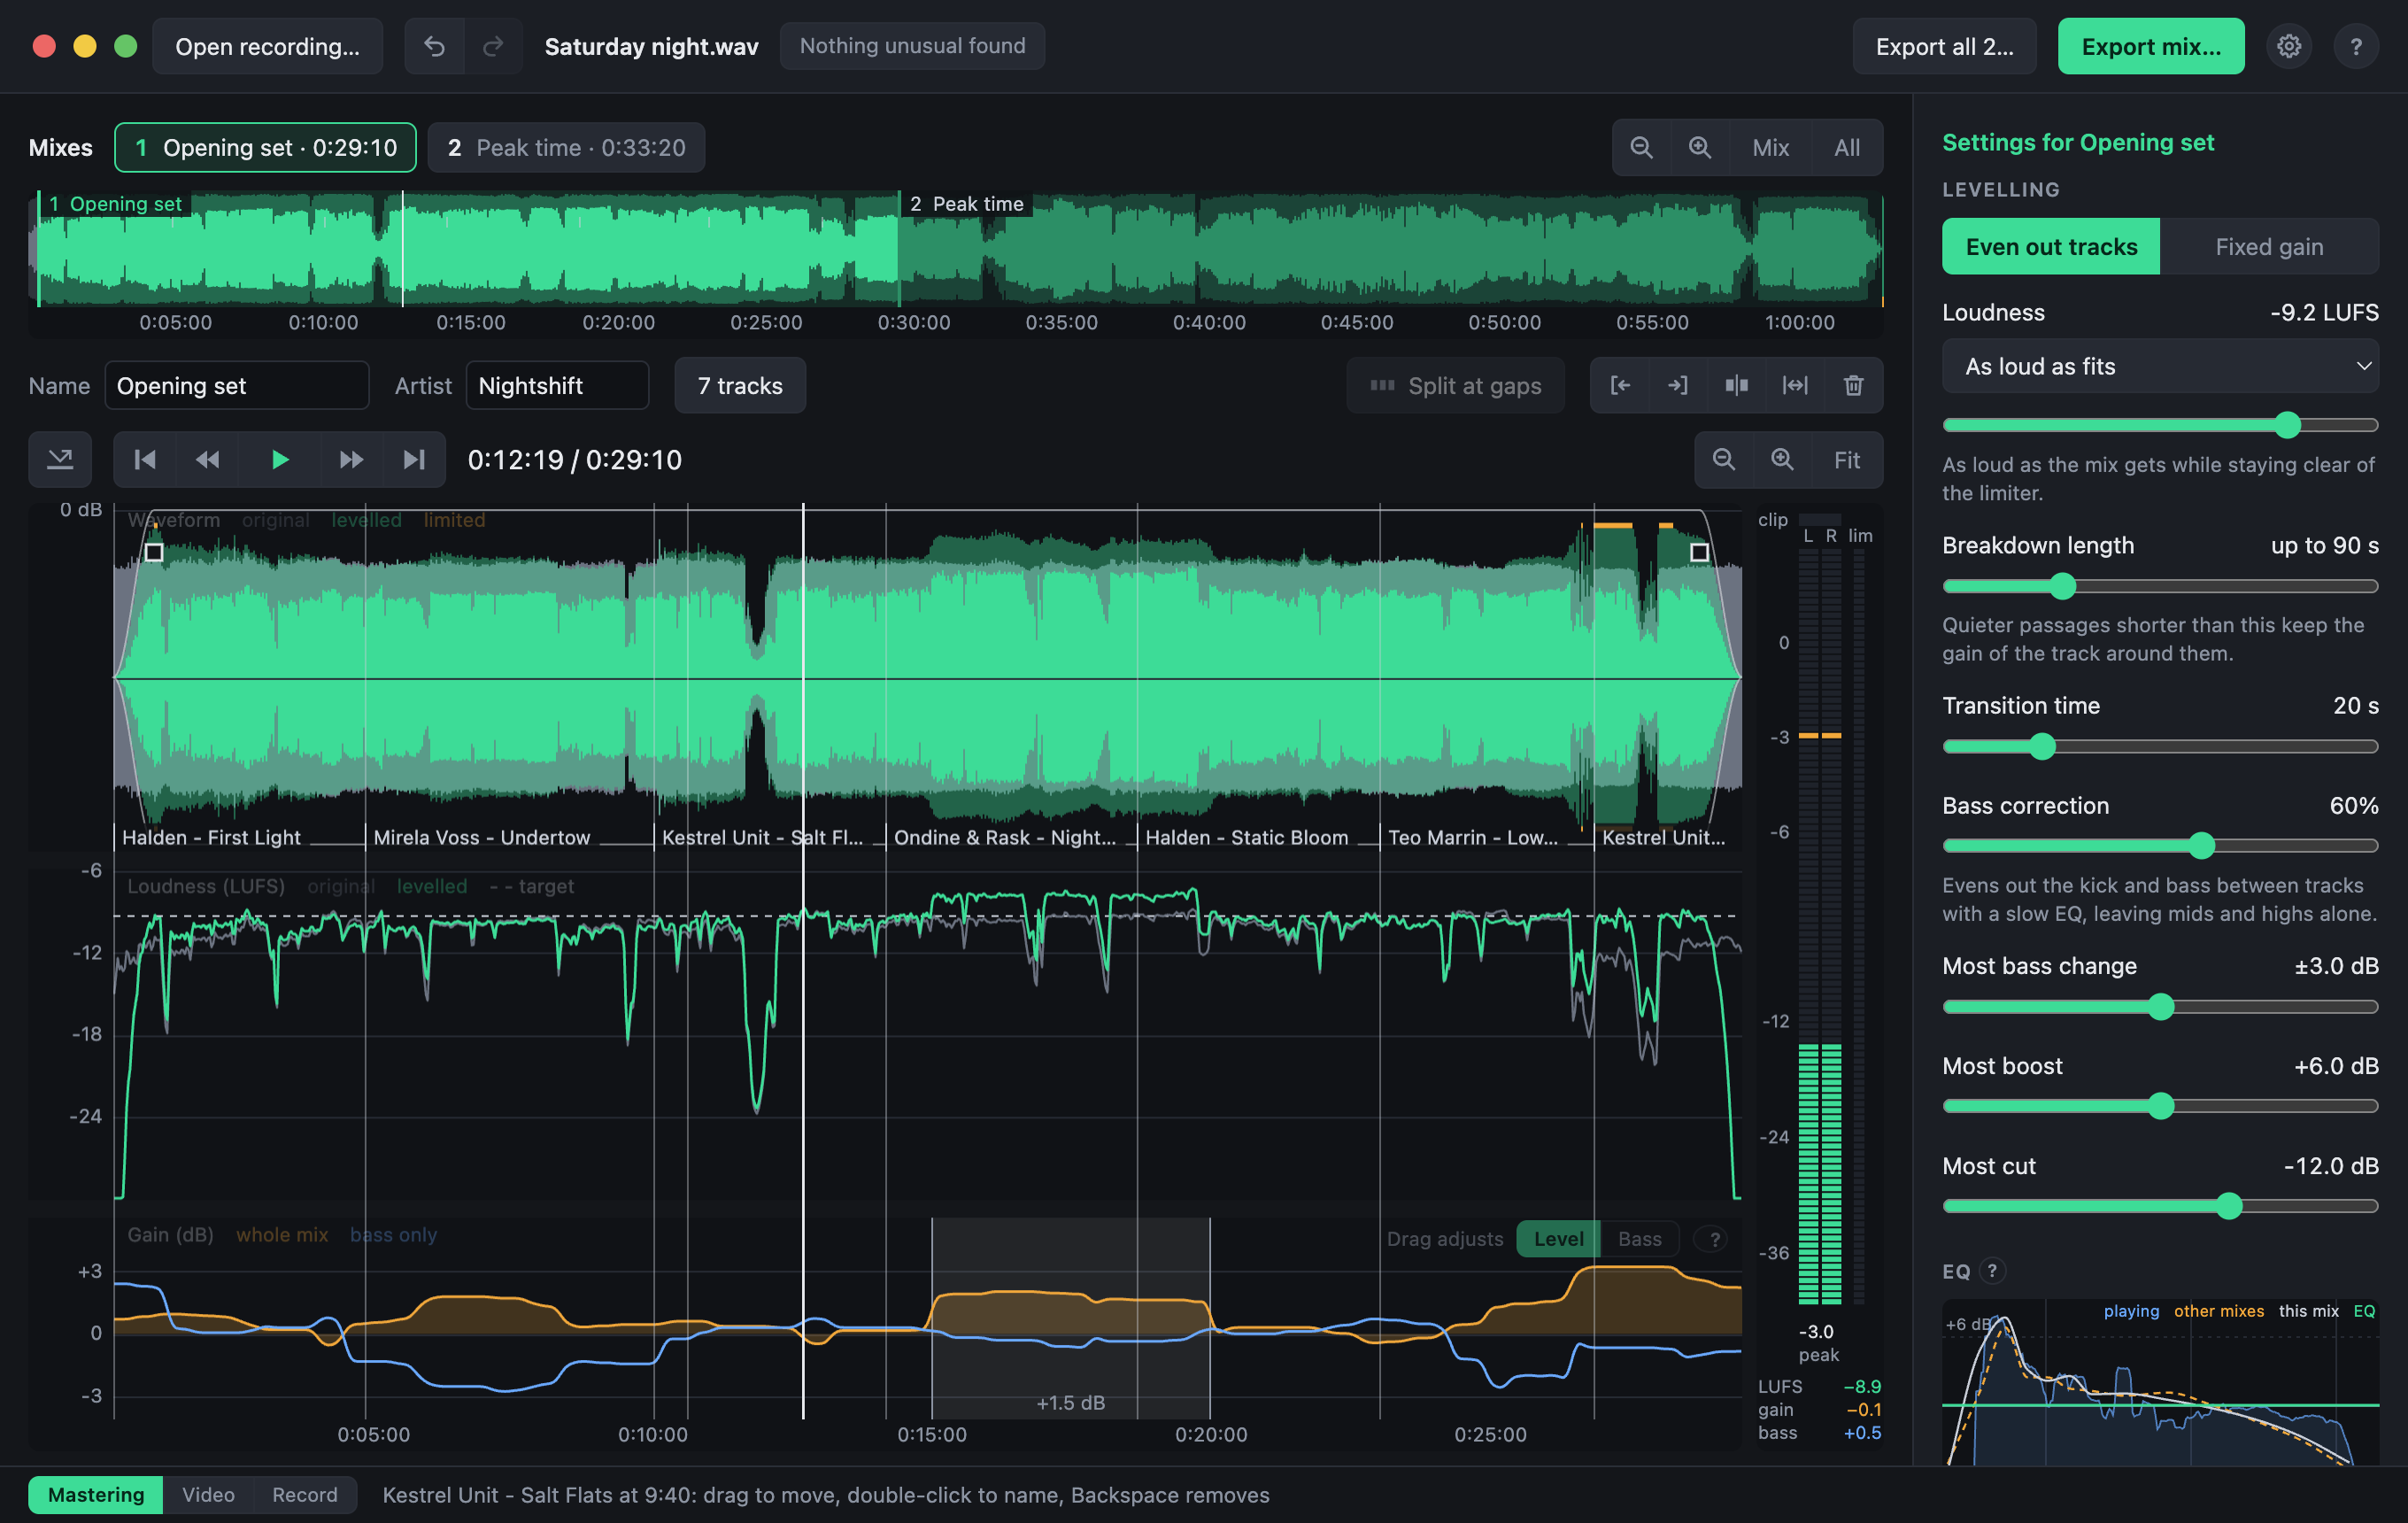
Below the recording is the selected mix: its waveform, its loudness before and after, and the gain being applied. On the right are the settings for how it is levelled.
Listening
Press Space to play. What you hear is the result, through the same limiter the export uses, and every change of a setting is heard at once.
- Bypass (the button left of the play controls, or A) plays the recording as it was, for comparison. It pulses while on.
- J, K and L run the playhead backwards, stop it, and run it forwards, faster with each press.
- The meter beside the curves shows what reaches each speaker, turning red above the ceiling, and how hard the limiter is working.
- Zoom in with a scroll or a pinch, down to half a second across the window, where single beats can be seen. Move along with a sideways swipe, or by dragging with the right mouse button, which works with any mouse.
How it levels
It levels track against track, not moment against moment. A slow gain curve follows how loud each track is at full energy. A quieter passage shorter than the breakdown length is taken for a breakdown and keeps the gain of the track around it, so breakdowns keep their dip.
| Setting | What it does |
|---|---|
| Even out tracks, Fixed gain | Whether the gain follows the tracks, or the whole mix is turned up or down by one amount, as on a mixer. |
| Loudness | How loud the result is. "As loud as fits" goes as loud as it can without leaning on the limiter. Presets aim at a level: Loud (-9 LUFS), Streaming (-14), Podcast or radio show (-16), Broadcast (-23). |
| Breakdown length | Quieter passages shorter than this keep the gain around them. Longer ones count as a quieter track, and are raised. |
| Transition time | How long a change of gain between tracks takes. |
| Bass correction | How much of the difference in bass between tracks is evened out, with a slow EQ. Off at first. |
| Most bass change | The limit on that correction. |
| Most boost, Most cut | How far a quiet track may be raised, and a loud one lowered. |
| True-peak ceiling | The highest level the output may reach. |
EQ
Under the levelling settings is an EQ, for putting right how a mix was recorded before it is levelled: a turntable's phono stage that makes records sound dull or harsh, a PA mixer's EQ left on, rumble from a turntable. The levelling measures the mix as the EQ makes it sound, so the loudness figures and the curves follow it.
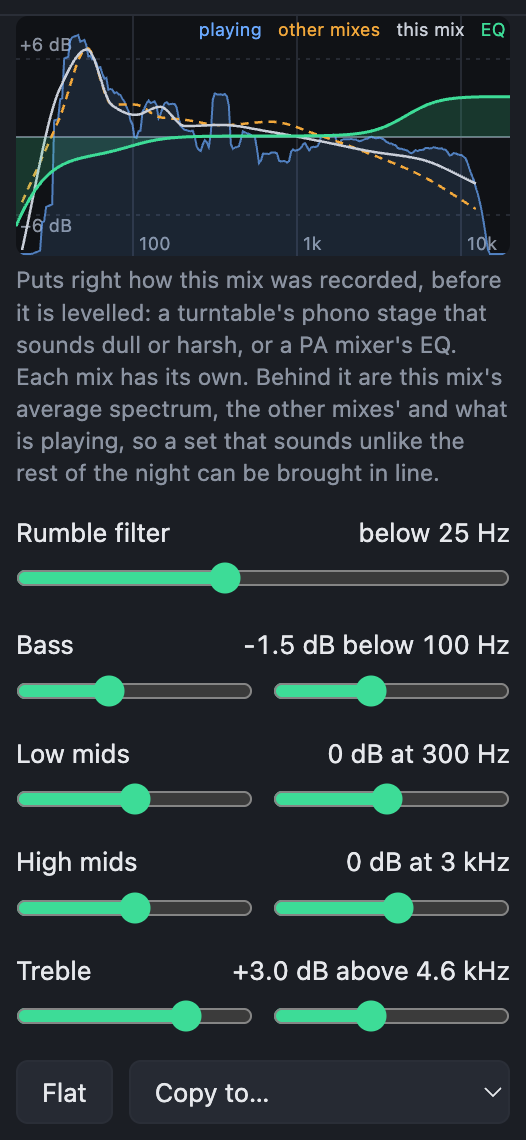
- Rumble filter takes out what lies below the frequency you set.
- Bass, Low mids, High mids, Treble each raise or lower their part of the sound by up to 6 dB. The left slider sets how much, the right one where: where the bass ends, where each middle band is centred, where the treble starts. The drawing above them shows what they add up to.
- Behind the curve are three spectra, lined up on its middle line: this mix's average (white), the other mixes' average (dashed), and what is playing, averaged over a second or two (blue). The averages come from the analysis, so they are there while paused, and this mix's moves as you change its EQ. For a set that sounds unlike the rest of the night, such as one played on records through a different phono stage, move the EQ until its line follows the other mixes'.
- Each mix has its own EQ, as the DJs of one night may have played through different gear: records through a phono stage, then CDJs. A new mix starts flat. Copy to gives this EQ to another mix, or to every other one; Flat takes it off. Reset settings and Apply to all mixes leave the EQ alone.
Bypass (A) turns the EQ off too, so you can compare. Double-click any slider, here or anywhere in the app, to put it back to its default.
Adjusting by hand
- Raise or lower a stretch: drag across the gain lane to mark it, then drag it up or down. The switch in the corner of the lane chooses whether a new stretch changes the whole sound or the bass only.
- Fades: drag the small square at either top corner of the waveform inwards.
Shortcuts
| Mac | Windows, Linux | Does |
|---|---|---|
| Space | Play or pause | |
| A | Bypass processing, to hear the recording as it is, and back | |
| ← → | Back or forward 5 seconds | |
| Shift+← →, Option+← → | Shift+← →, Alt+← → | 30 seconds, 1 second |
| I, O | Start, or end, the mix at the playhead | |
| ⌘E | Ctrl+E | Split the mix at the playhead |
| M | Mark a track starting at the playhead | |
| J, K, L | Run backwards, stop, run forwards; press J or L again to go faster | |
| Return | Jump to the start of the mix | |
| End | Jump to just before its end | |
Shortcuts
| Mac | Windows, Linux | Does |
|---|---|---|
| Click | Put the playhead there | |
| Scroll, or pinch | Zoom in and out | |
| Swipe sideways, or drag with the right button | Move along the mix | |
| Drag a square handle inwards | Fade in or out; back to the corner removes it | |
| Drag across the gain lane | Mark a stretch to adjust by hand | |
| Drag a marked stretch up or down | Raise or lower it | |
| Drag a stretch's edge | Make it longer or shorter | |
| Double-click a stretch | Remove it (or point at it and press Backspace) | |
| Drag a track marker | Move where the track starts | |
| Double-click a track's name | Type it in, as Artist - Title | |